The Dashboard tracks a user's work with leads and shows statistics on the user’s activity.
Saved Leads
The trend chart shows the total number of saved leads. When hovering over the chart points, the user is shown the number of leads at the specified time point.
Scheduled follow-up contact
The Calendar for the current month shows scheduled follow-up contact dates. The user can hover to see the number of leads on a specific date. By clicking on the date, the user sees the corresponding leads and can open a dialog by clicking on them.
Processed leads information
A pie chart shows general information on processed leads: this includes the number of leads saved, scheduled for contact with a follow-up reminder, deleted, sent to Spam, and archived.
Deleted and archived leads
A trend chart shows the total number of deleted and archived leads. The user can hover the cursor to see the number of leads at a specified time point.
A date picker is provided to display statistics for a designated period.
Guru Feed
The Guru Feed is a feed of leads that a user can filter by tag, location, technology, and date. The user begins active work with leads here by executing commands such as Save, Delete, Send to spam, or start a chat.
Lead data collection
A lead search and filtering panel is carried out automatically based on a machine-learning algorithm.
The user can search leads by selecting a period of time, location, keyword(s), and/or tag(s).
Users can save up to 5 search parameters that will appear in the main menu for the new item as Quick Filters.
The Guru Feed page consists of three blocks:
The first block is a feed of automatically found leads. When you click on each lead, the original message is displayed in the middle block (also known as the dialog box).
There are three buttons in the upper right corner of the active lead card: Save, Spam, and Delete.
Save button. After clicking this button, a chat with the lead becomes available.
Spam/Delete button. The lead is removed from the list of found leads and placed in Sorted Leads.
Lead-scoring data is displayed in the colored bar on the left side of the lead card (red, yellow, green), which shows the lead’s activity level. The most active leads, whose messages often appear in the feed, are marked in green. The least active leads are marked in red.
When the author of the publication indicates his position (CTO/CEO/Founder), it will appear next to the name.
The message of the active lead is displayed in the middle block.
To start a conversation/chat with a lead, a user needs to click the Save button. In this case, the lead is automatically placed in the first column of the default board in the Boards.
A notification about hot keys that can be used instead of the Save and Delete buttons appears at the bottom of the dialog box.
If a lead is not relevant, a user has the option to send it to Spam or delete it. Messages from a user whose lead was sent to Spam will not appear in the Guru Feed again.
Live chat
When you click on each lead, a dialog box is displayed in the center of the page. Here, the user can activate a chat by saving the lead.
The user can chat either on the Guru Feed page or in Live Chat (the mail icon next to the user name in the upper right corner).
In Guru Feed, there is no need to search the lead’s message for contact information—you can immediately start chatting with a potential client. Take into account that the prospect will see your message not as an answer to their post but as a new direct message. Therefore, you should remind them which message you are responding to.
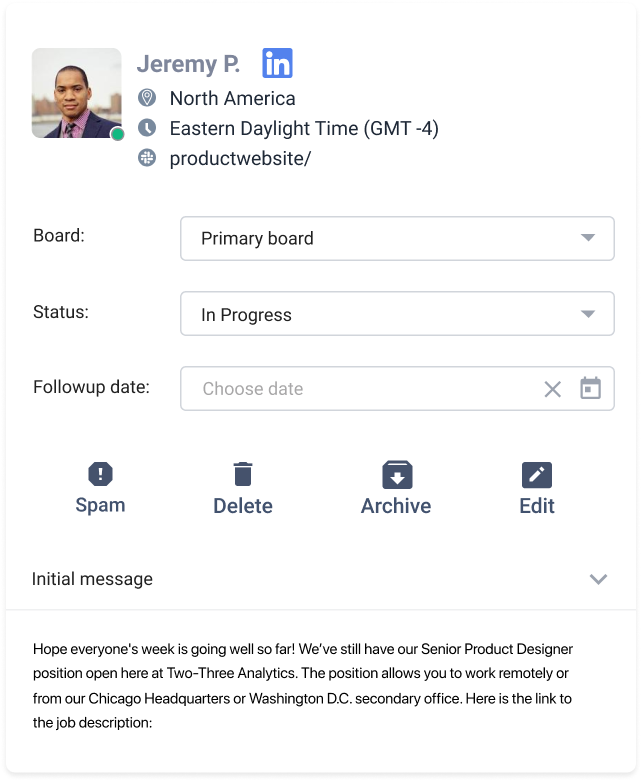
Lead Info
The right block contains detailed info about a lead. LeadGuru functionality allows users to assign tags to leads, use tags to search for messages, and save the message history of a specific person on a specific topic.
After a lead is saved, the following fields are added: the initial message, i.e. the post itself, to which the user responds, company information, contact information, and user notes.
The easily viewable initial message serves as a reminder of the previous topic(s) of conversation when you begin chatting, so there is no need to return to the beginning of a conversation’s history.
Next to the lead name, there is a link to their LinkedIn profile or to the LinkedIn search results for their first and last name. There are Delete and Archive buttons. Using the drop-down list of boards and statuses in the lead card, a user can:
assign a board
assign a status
move a lead to another board
change a status
set a follow-up date
view an initial message
review chat history
view company information
view contact details
edit lead profile info
set a reminder
Set a reminder
After sending a message, the user can set a reminder for a specific date using the follow-up contact date drop-down list in the calendar.
Tracking of follow-up reminders
The user can track their follow-up reminders on the Dashboard page or calendar. On the day of the follow-up contact, they will see a red dot next to the Dashboard or a blue dot in the calendar.
If the user does not set the follow-up date manually, it is automatically set as the day after the initial message was sent.
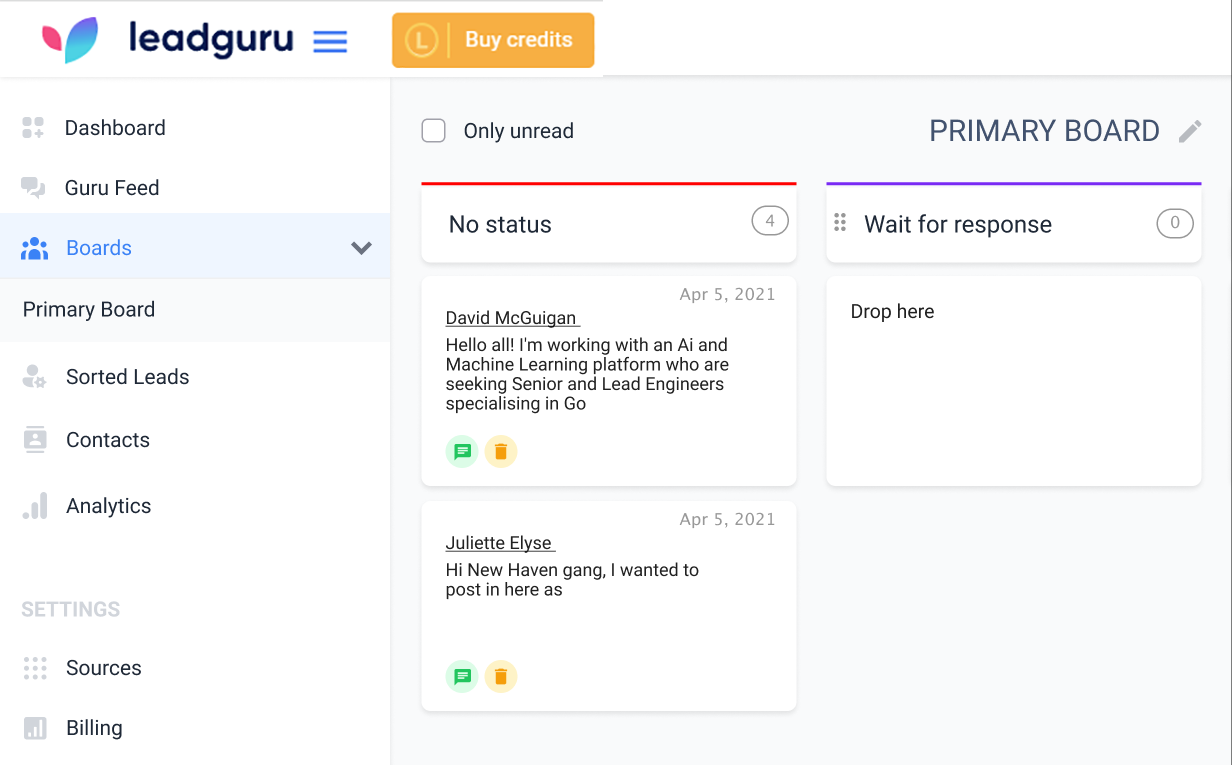
Boards
Depending on their needs, the user can create boards for different categories (position / specialization / vacancy / qualifications / etc.) The user can assign boards and statuses to the saved leads to help them track the progress of each lead in the workflow.
Organize with boards and statuses
LeadGuru allows users to create an unlimited number of boards to track leads according to area, qualification, position, field of activity, task, etc.
The user can edit the names of boards and columns according to the relevant tasks and processes. For example, Boards can be used to track the progress of work with leads that have a certain qualification or status. These features can be customized for a wide range of uses.
The Primary board is a default board on the Boards page.
The user can create boards by clicking the “+” button next to the Boards menu item. They can create statuses by clicking the Add Status button on the new board. When saving a lead, the user can immediately assign it a board and a status. If necessary, these selections can be changed through the board and status dropdown menus in the lead card, or directly on the Boards page. Lead cards can be freely dragged from one status to another on a board.
When the user saves a lead, no board or status is assigned to it by default. It will appear on any of the existing boards in the first column, “no status.” Then the user can assign it the desired board and status.
Sorted Leads
This page contains all leads that have been deleted, sent to Spam, or archived by the user. The following information about the lead is displayed: name, message, tags, location, and publication date. The user can restore a lead from Sorted Leads storage by clicking the button in the “Actions” column. After recovery, the user can continue working with the lead.
Contacts
The user can search for a contact in the available workspaces (Leadguru and Personal ones) by contact name, workspace name, company name, title.
In the search results, the user will see a link to the LinkedIn contact search, a link to the workspace of the contact, and the contact’s title and company, if it is indicated in the user Slack profile.
If a contact is found in a Personal workspace, a chat will be available immediately after saving the contact.
If the contact is found in a Leadguru workspace, the user will be prompted to connect this workspace first.
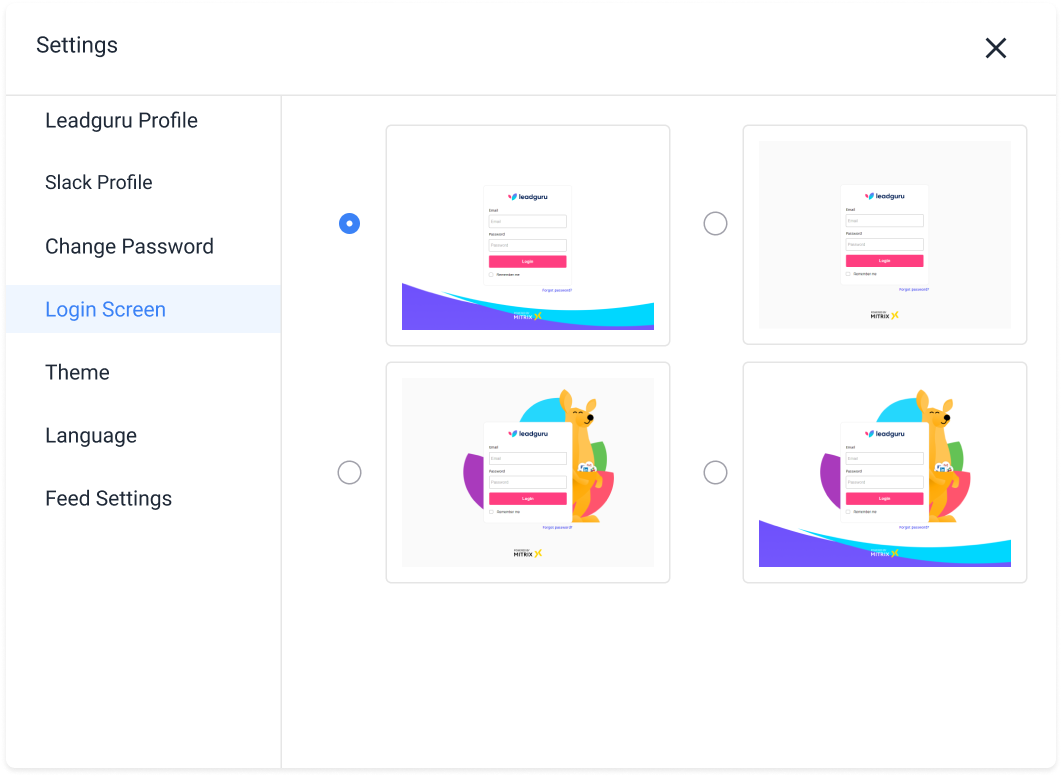
Settings
Sources
Leadguru will find leads for you in two main sources: preconnected Leadguru workspaces and Personal workspaces connected by a user. You can see and manage all Personal workspaces on the Sources Tab.
If you want to add a chosen workspace to your Leadguru account, register on a chosen workspace, get login and password and enter credentials to Leadguru. For more detailed information, read our article.
Note: You can order Personal workspaces connections from the Leadguru team. Such communities will be marked with the Leadguru Logo. Leadguru has a 350+ workspaces collection.
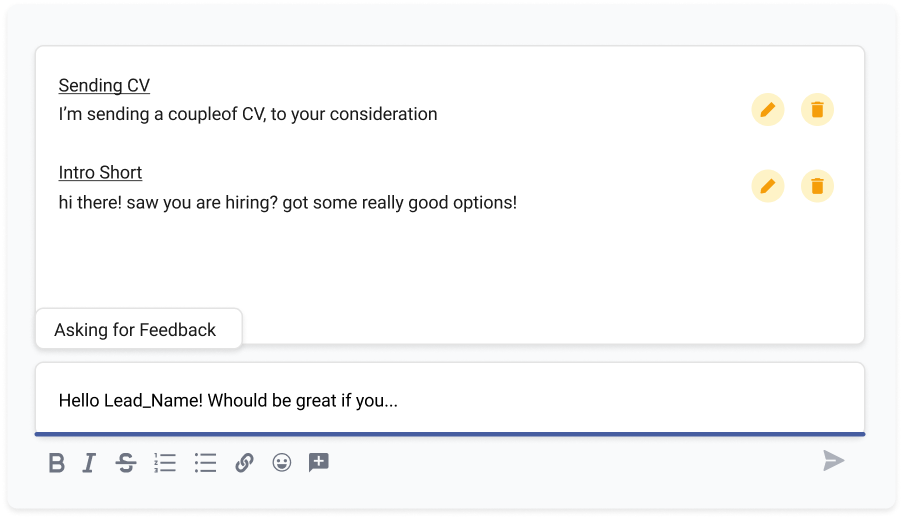
Templates
The user can create /delete/view/edit message templates for their further use in communication with the lead. For convenience, it is possible to specify the theme of the template and add automatic placement of the lead name.
After creating the template, the user can insert the template from the chat directly. When you click on the template insertion button, a list of templates will appear with an indication of the theme of each template. When hovering the cursor over a separate template, the user will see the text of the template.
Leadguru Profile
Leadguru Profile contains system information about the user: name, company, email, and position. Here the user can edit the account data, including relevant leads search preferences.
Slack profile
Slack Profile contains the information displayed in the user’s profile in the connected platform.
Note: When creating an account in LeadGuru, the user specifies the first and last name, position, and company. The user doesn’t see the information after this point, but all of the communication is carried out on behalf of this specified person.
Settings also contain the set of account preferences: choice of login screen, application theme, app language, default board settings, Feed settings
There is no problem, you can always ask the Leadguru team to search and add workspaces for you. It will cost you 400 points per workspace from our Slack workspaces collection.
Incredibly easy. Just register on a chosen workspace, get login and password, and enter credentials to Leadguru. For more detailed information, read our article.
In order to deliver superior & personalized user experience we use cookies. Find out more.